Sunday, December 22, 2013

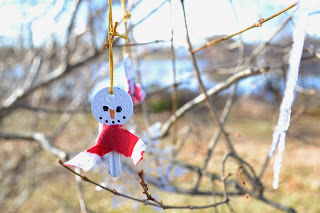
Light Up Snowman Ornament


I absolutely LOVE snowmen. They are my favorite part of winter and the holiday season. These Christmas ornaments are quick, easy, and inexpensive! They make great teacher gifts, stocking stuffers, and items for craft shows too.

What you will need:

Battery operated tea lights
Black Sharpie marker
Ribbon
Hot glue gun
Optional: orange sun catcher paint

I got my tea lights at the dollar store. Two came in a pack.

1. Start by taking the strip out that comes in the back of the battery compartment. Also, now is the time to test to make sure the lights work!

2. This is optional, but I then painted the "noses" of the snowmen with orange sun catcher paint that I found it at the dollar store. I realize that not everyone will be able to find this, but I wanted to paint the noses orange to look like carrots. They also look great not painted either. It is up to you!
I did about 3 coats.

3. Draw a cute little snowman face on the tea light. You want the switch to be at the bottom of the ornament, so have that in mind when you draw the face.


4. Hot glue some ribbon on the back of the ornament


The finished product:

Have fun with these and remember that you can dress these up anyway you want! 

I wrapped them up in clear plastic bags with a piece of white taffeta, and tied it with a ribbon.  
 Enjoy, and Happy Holidays! 

Monday, November 25, 2013

Almond Joy Pretzels!


This is a quick and easy snack to make if you have company coming over. Crunchy, smooth, sweet, salty; this treat is many things in one!

Ingredients:
1 bag of milk chocolate chips
1 bag of sweetened tender flake coconut
1 bag of sliced almonds
1 bag of mini pretzels


1. Place the chocolate chips in a microwave-safe glass bowl. Microwave for 30 second intervals, until melted.


2. Add the pretzels to the melted chocolate.Stir well to coat. I didn't add the whole bag because I wanted to leave some more room for the chocolate, but it is all a matter of taste. Add as many pretzels as you like.

3. Stir in half of the coconut and almonds. You will need the rest later. 


4. Spread the mixture on a baking sheet lined with wax paper.Top with remaining coconut and almonds


5. Place in the fridge for a couple of hours to get firm, then break into pieces. 


Store in a container with a lid. It will stay fresh for a few days, if it lasts that long!

Wednesday, November 20, 2013

Snowman Key Ornament!


Brrrrr, it's cold out there! All this cold weather makes me think of snowmen!
So here is a very simple and quick ornament using some stuff that you might have around the house.

What you will need:
. Old keys (that you do not need anymore!)
. White spray paint
. Black Sharpie marker
. Orange Sharpie marker or orange paint
. Cloth or ribbon
. Hot glue gun
. String
. Scissors

I chose two circle keys


 Start by spray painting them white. I did two coats. 

When dry, draw a cute little snowman face on the key with a black Sharpie. 

Then paint a carrot nose on the snowman. You can also draw it with an orange Sharpie if you have one. 

Cut your cloth or ribbon to make a little scarf for your snowman. I fringed the edges to make it more scarf-like.

Hot glue the scarf to the snowman ornament. 

Add string, and there you go! 


An easy and cute ornament for your Christmas tree! These also make great gifts! 

Thursday, November 14, 2013

DIY Holiday Gift Card Holders


The Holiday season is creeping up on us!
I love making homemade gifts for Christmas. I also love recycling things to make new things. This project combines both, and it is something practical and decorative for gift giving. It is an easy and inexpensive project too, and the kids can help!

What you will need:
. Empty Altoids tins
. White spray paint
. Decorative tape ( I used "laser" tape, but you can also use Washi tape)
. Holiday stickers
. Scissors
. Mini stick on bows

Start by wiping out the Altoids tins real well. I chose to decorate 6 tins. 

Spray paint the tins with white spray paint. If you would like to paint the tins a different color, just make sure that you paint them white first. This way, the color will show up better. I kept things simple and just used white.
I sprayed the tins a let them dry for a couple hours in between coats, and then overnight on the last coat. I recommend spraying 3 to 4 coats.
I know that you can still see the Altoids logo through the paint, but we are going to be covering it up with tape and stickers. So don't worry! 

Now for the tape. I was originally going to use Washi tape, but I came across this at the dollar store. It's called "laser" tape. I thought it was more festive and sparkly, and it turned out to be easier to apply. The width of the tape was perfect to go around the tin!

I also found these Christmas stickers in my craft box. I thought the would be cute to decorate with. You could also use scrap booking embellishments and just glue them onto the tins. 

So first I Taped around the bottom edge of the box. No trimming necessary, it fit perfectly! Don't you just love when that happens? 

I then went around the top edge of the box and folded down the extra tape. You might have to do a little manipulating with the tape until you get it looking just right. I did a little snip at the corners so the tape wouldn't bunch up. 
Then I started taping across the tin to cover up the white, and cut it to fit. 
My middle son helped me decorate them with stickers!

I found some sparkly tissue paper and put it onto the tins.
Here are the finished tins:

Snowman 

Tree and Wreath 

Penguin 

Snowman & Snowflakes 

A Christmas present. For this one I just put tape around it to look like a present and then added a mini bow. 

Santa Claus! 

So there are my DIY Holiday gift card holders. Feel free to adapt this project with items that you have on hand. The possibilities are endless! 


Wednesday, November 13, 2013

Hello! This is my first post! I am so proud of this blog, because I've wanted to do one for so long. I just decided to jump in and do it!
So here I am.
I'm Caitlin and I love baking, cake decorating, crafting, DIY, photography, sewing and anything else artistic and creative!
I am married to a wonderful husband, who is my big support. I am a mom to three wonderful little boys, ages 5, 3, and 2! My house is often chaotic, but I always try to do something creative!
I hope everyone can share in my domestic journey!
Keep a look out for future posts.
Much Love,
Caitlin